Using this simple and free method to back up files in Windows 7 can and will save you time and money. If that is not enough to get you to back up your computer I will add that this operation can and will save your data. Your photos, documents, music, email, favorites, and everything else you value on that computer. The claim of simple, being such a relative term, may be argued but you can’t screw up your computer giving this a try and the upside is that all of your stuff can be restored in the event of unexpected annihilation. It’s free in the sense that you already paid for Windows 7, of course you did, and this back up utility is part of that operating system.
I am using the title back up files in Windows 7 but this includes Vista instructions. Windows XP has a backup utility but it first needs to be installed from the XP disk. Just email me if you need XP specific details and I will be happy to guide you. I only exclude pre-Vista versions here as my posts can get long due to my compulsion to explain why I do things such as leaving out XP due to post length.
Another habit of mine, sometimes considered excessively thorough, is to offer multiple options when one would suffice. For example, I will give you three of the several ways to access the back up and restore feature built into Windows:
Option 1:
The first method, my favorite, will not only get you there quickly but will eliminate the need to read option 2 and 3 that follow. Left click the Start Button globe in the bottom left corner of your screen. Right above the globe button is a text input window with grey letters spelling “Search programs and files.” Left click in that window and type “backup” or “backup and restore” omitting the quotes I used hoping for clarity. Atop the list of results should be the link leading to where we want to be.
Option 2:
Open Backup and Restore by clicking the Start button , clicking Control Panel, clicking System and Maintenance, and then clicking Backup and Restore.
Option 3:
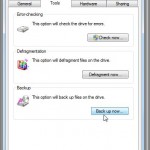 Open up Computer. It’s an icon that looks like a computer and you can find it on your desktop. Double click the little computer. A list of all the storage devices attached to your computer appears. Right-click on your local drive (C: Drive) and select Properties from the list that pops up. Then click on the Tools tab and finally click the Back up now button.
Set Up Backup
If you’ve never used Windows Backup before, click Set up backup, and then follow the steps in the wizard. If you’re prompted for an administrator password or confirmation, type the password or click OK for confirmation. 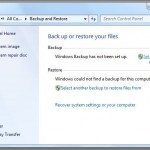
If you have created a backup before, you can wait for your regularly scheduled backup to occur, or you can manually create a new backup by clicking Back up now. If you’re prompted for an administrator password or confirmation, type the password or click OK for confirmation.
Now Choose Where To Save
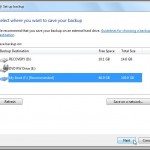 Now choose where to save the back up: This is where we lose a few folks so hang in there. Windows will search for a suitable drive to store the backup or you can choose a location on your network. If you backup to a network location you might need the password to the share. By the way, I am setting up my first stand alone server instead of a local area network and if I can put the experience into words I will explain it all to you soon.
The back up destination location chosen should not be the same hard drive you are backing up. The purpose of this ordeal is to preserve critical data by isolating these files from any event that would instigate a catastrophic loss. In the image above let’s say that System (C:) is the Windows partition of the main hard drive; therefore not offered to us. Recovery (D:) is a partition (invisible separating wall inside the C: hard drive) reserved for Windows reinstallation files and also not useable for backing up C: drive.
RW (E:) is the computer’s CD or DVD player. This is a suitable destination provided you have blank recordable disks. It often takes several DVD’s for one back up session.
 My Book (F:) represents an external hard drive enclosure and is the popular choice for initial and scheduled recurring back up sessions. The external drive that you connect may show up on this list as D: Passport, or E: Seagate, or G: Removable, etc. You will know it when you see it since it wasn’t there moments before. If do not feel confident in your choice, do nothing, call me first, I will walk you through it without attitude or wise crack.
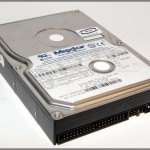 Another option is (D:) as a physical stand alone hard drive inside the machine. While still subject to power surges that can mess up C: Drive, a separate D: hard drive inside the machine does protect backed up data from C: Drive mechanically failing or most malware/virus attacks.
If you are updating your hard drive, and the old one is still good, use it for this back up internal drive. Fast transfer rates but subject to fire, lightning, theft, etc.
If you have just a few hundred photos, some Word documents, a few years of tax returns, and some email addresses, you can even use a USB thumb drive. They go for about a buck a gigabyte on sale. Right click on the my Documents folder, or the folder with your name on it in the Users folder list, and if it is 20GB or so you can use a couple of 32GB USB drives keeping one back up at another location for safe keeping. 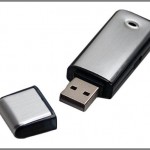
Always store media used for backups (external hard disks, USB drives, DVDs, or CDs) in a secure place to prevent unauthorized people from having access to your files; a fireproof location separate from your computer is recommended. You might also consider encrypting the data on your backup.
Network Attached Storage and Windows Home Server
(I am working on it) are options outside the difficulty parameter of this post.
Okay so it’s only simple and free provided you have an external drive, USB drive, or short stack of CD/DVDs on hand. Still free and safe from viruses if you partition some C: Drive available space for D: Drive but then we lose the easy factor perhaps. Oh well, is it false advertising if it’s free advice? Either way I have likely strayed from the original purpose. Where were we?
Now Choose What To Save
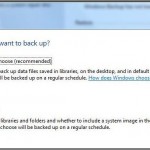 Right. You have selected your destination and are ready to select what you would like backed up. You can let Windows choose, and we shall in the interest of ease, or you can manually select files and folders to be included. This would be necessary if you have changed the default location of where things go when they are saved. If you are doing such things then you don’t need this guidance and I doubt you have read this far. See you next time.
Schedule Your Back Up Plan
Now that Windows knows what to save and where to put it you should take a moment to set up a schedule for regular updating of your back up. This is also easy and very much worth the time. The frequency you select will dictate how much time elapses between your last save of everything and therefore how much potential data loss is being risked. Perhaps once a month is good for people who use the computer once a week. If you use the machine every day maybe once a week is more appropriate. Every night is the kind of peace of mind some folks need and that is not a problem since you can set how much space to allow for backups on the destination device. As your set space limit is reached the oldest back up is removed to make room. You can keep it trimmed down to a minimalist one batch at a time or get yourself a big old storage device and hoard a years worth of redundancy.
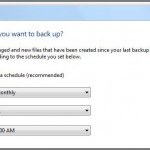 Keep in mind that only differential data, or stuff that has changed since your last automated back up, is added to the most recent save. Usually not that much each day or week unless you download your CD collection one weekend. So don’t imagine that the more times you back up the more space you use; unless you manually create disk images each time. Not necessary and a little cuckoo.
Create A Disk Image
Early in the process you have a little check mark available for choosing to create a disk image. An image is an exact copy of every bit of data on your computer a given point in time. With this image, no matter how bad you screw up your program files or delete something crucial, you can restore your machine to the precise state it was in on the day you created that disk image. This is not for the emails you received over the last week but for the photos you have taken over the last decade. Likewise to reinstall a program you love but have lost the necessary installation disk. You can get back the ten year old birthday invitation program you love but can’t buy anymore, but you have to go back in time to get it, thereby losing everything you’ve done since disc image day. For that gap in data you have the external scheduled saves.
This is a large file of course since it is a carbon copy of your entire computer. Beware, this method copies all those temporary internet files, recycle bin trash, and all manner of crap you don’t need, but is the simplest way to achieve a do-over if you want to avoid restoring programs manually. My last image was 97 gigabytes so it’s not something I would want to put on 25 DVD’s but with the falling prices of gigantic external hard drives space is not the issue it used to be. Just a box check marked and a mongo hard drive.
Almost Done
Once you have all that set up Windows will show you the summary of what will be saved and ask you a couple times if you are sure it’s all good. Then, depending on the amount of data to be saved and the speed of your computer, you have between 15 minutes and a few hours to go fly a kite or something. You will come back to another summary of success and know the warm secure feeling of having a disaster recovery plan when most people you know have none. You will thank your superior self later.
It looks like the portion of this post regarding restoring data from your back up will be in the next article. Meanwhile, if you don’t need to completely restore an image, or replace deleted files, maybe things just seem weird since you installed a certain program? You can use System Restore to return the machine to the way it was a few days or weeks ago depending on your System Restore settings. I suppose I should put down a few words about that process too.
Thanks for reading and commenting,
– Steve


hello, that is a cool report! it gave me exactly the information i was looking for.
great site, and super article.
Back up is the most important thing and it must be created to avoid the loss of personal data. In this blog a complete procedure is defined that helps even new users of windows 7.
Whenever I come to your blog I always get interested in what you have written.
thanks for sharing this. it was really an interesting and informative article. pretty cool post