This week’s Cleaning Your Computer continues the previous Clean Your Computer article, shifting focus from cause and effect to method, including some minor computer dismantling for those willing.
Removing dust from the monitor or LCD screen
can be easily done with a cloth. Only a microfiber cloth or 100% cotton cloth such as flannel should be used to avoid permanent scratches. If it is necessary to add liquid to the cloth to remove evidence of sneezing\shouting towards the screen, bug squashing, food fighting, or other environmental mishap, then I recommend a simple solution.
Mix equal amounts of isopropyl alcohol and water in a suitable container.
The alcohol is safe for the screen with a bonus of killing power over many germs and bacteria. Rubbing alcohol also rids the screen of those persistent oily fingerprints left during the traditional mashing of visitors’ fingers against the screen to make a point.
At the risk of seeming dictatorial I will proclaim as a rule that this mixture is the only cleaning solution to be used. I suppose commercial screen cleaners will be given dispensation if time is taken to read the label’s list of ingredients and warnings. Add the liquid to the cloth rather than directly to the screen. Save the alcohol solution, at a safe no-spill distance, for use on the keyboard, case front, buttons, etc.
Safety Tip: When soaking brats in beer, adding wine to white sauce, or splashing bourdon in the biscuit gravy, it is customary for the cook to sample the ingredients. When blending the alcohol solution as directed in this article any temptation to sample must be resisted if you are to live to enjoy your clean machine in the future.
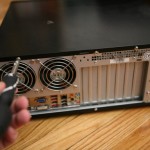 Now to the inside of the computer case. Of course you will turn the computer off, unplug the power cord and all other peripheral cords, and bring the case somewhere comfortable and reasonably clean. The side panel of the case will have to come off. That is the side panel opposite the motherboard allowing a clear view of the entire interior. Older cases usually have two Phillips (+) screws or thumb screws on the back that hold the panel. Removing the screws allow you slide the panel off. Newer machines, especially brand name machines, now have push button release triggers instead of screws. Check your manual. If you can’t find your manual, type your computer brand and model number into an internet search, and you should find a suitable manual easily enough.
Your desktop case interior can collect a large amount of dust, dirt, fuzz, fur, etc.
In most cases years of accumulated crud will be found. Weather permitting take it outside. I say this as someone who is adversely affected by allergens and there is a mother load in that computer case. Regardless of allergies, as a matter of practicality, the dust you remove from the computer case while windoors will likely land on some other object which you will have to dust off anyway. Some of it will end up back in the computer no doubt.
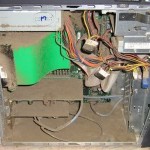 That is why I take the thing outside and carefully direct my air compressor nozzle blasts at every spot of dust I can find. This is the smaller compressor of the two in the garage mind you. The kind you fill flat tires and pool toys with; not the kind you hear busting lug nuts off of pick-up trucks at Discount Tire. Use common sense or be prepared to hunt down green colored memory boards in green colored grass within a 300 foot radius of any “Tim the Tool Man” incident. If the air compressor has been sitting a while, moisture can condensate in the tank, use the drain at the bottom to let out any water. Point the nozzle at your hand (not your face) to detect water in the tank or air line. Now I make this compressor recommendation to explain my own method and to save you some money. I am not suggesting you buy an air compressor just for this task. A $10 can of compressed air will do for a machine or two but if you have a compressor use it. If the neighbor has one try to use that. If you handle this right you can add a tool to your collection by explaining the various benefits of having an air compressor in the garage. Obviously the computer, and the data stored on it, would be considered well worth the investment. If more persuasive evidence is necessary think of the many other uses for a compressor and a reasonable collection of attachments.
- A flat tire found when running late on a cold morning?
Not a problem. - The collection of kiddy pools and assorted air filled sport toys?
Heart attack avoided. - Many units come with brad/nail guns that make home improvement projects more
likely to finally get done. - Air powered impact wrenches and an internet how-to search can save hundreds on auto repairs.
- Proper care for all equipment includes clearing out dirt, grass clippings, rust flakes, etc.
- The number of chores made possible or with results improved is limited only by ones imagination.
Good luck and good hunting.
Couple of things while I am thinking of them:
– Avoid touching things inside the computer. Since you will still be compelled to poke
at something in there, touch the metal case first, to discharge static electricity in your body in a safe way.
-If using the compressed air in a can hold it upright to keep moisture in the can from
getting on computer parts.
-It’s fun to make the fans spin with the air from the compressor nozzle but the insane speed required to make the best fan noise will cause lubricants to fly out of the fan motor bearings shortening fan life. Use a pencil to gently keep the fan from spinning while blasting air.
-Keep grabbing the metal case to discharge that static electricity.
If doing this indoors I vacuum as I go, first the outside case and the vents, then as I open the case I hold the vacuum hose in one hand while blasting the computer with
the can of air. There is a potential for static electricity build up when dragging the vacuum around the internal parts of the computer; not to mention banging into something delicate. To be safe you can just lay the vacuum hose near the computer, or hold it a foot or so away from the computer. The dust will generally find its way into the vacuum unless room fans are circulating air too.
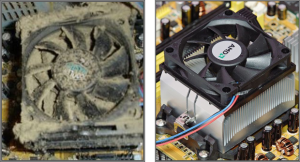 Special attention should be paid to the heat sink/fan which cools the processor, any stand-alone video card that has its own heat sink and fan, as well as the power supply. These are the big producers of heat and need to breath. The photo shows the shiny silver blades of a clean heat sink that can efficiently transfer heat energy away from the processor and into the case environment where case fans exhaust that heat. The power supply fan cools the transformer that powers the machine and also acts as a case exhaust fan.
 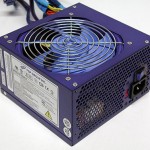 Dust has a way of playing cat and mouse. Blow dust off one part and some of it hides around a corner. Dust does not leave willingly. Eventually you will get all the dust out. Have some fun with it, take the time to do it right as long as you are in there, and remember this is necessary maintenance.
Laptops get dusty too. Signs of a clogged heat sink in a laptop might be an increase amount of fan activity, an increase of
heat at a certain spot on the bottom of he case, or unexplained shutting down
of the computer for no apparent reason. The compact nature of the laptop eliminates
most of the air space present in a desktop case environment. On one hand this
means less dust floating around landing on components. On the other hand this
means that all the dust that does get into the laptop has a much more
concentrated path to travel; or settle.
The alcohol solution is still the thing for the dust on the screen, keyboard, and case exterior. That can of compressed air will work pretty well for the parts inside.
Be patient, with limited access to the dust, a less direct removal method will take a bit of time to be effective. The alternative is exploratory and surgical in nature.
Level one difficulty involves turning over the shut down laptop to find the intake vents on the bottom. Slots or holes are what you are looking for back there. Blast them. Then, usually on the side or rear, but occasionally on the bottom, you can find the exhaust vent. The spot where you usually feel the heat pouring out during everyday use. Hit that with the air as well. Start up the machine, shut it down, repeat the process.
Level two difficulty would have you removing the battery, the hard drive, and
the cover plate for the memory. Usually one screw removed, plastic panel lifted
off, hard drive or even memory carefully slid out, and then you have additional
points to apply forced air.
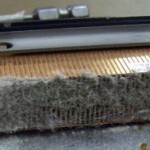 Level three difficulty continues with the removal of an additional dozen or so case screws while the unit is still turned over. I recommend the manual be read, or at least be on standby for this operation, as it has instructions and warnings that will save time and offer calamity avoidance insurance. The online version from the manufacturer’s website many times will have step by step removal/replacement instructions; with pictures.
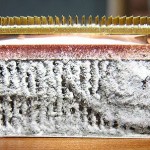
With the case partially removed you can spray air everywhere but more importantly you can access the heat sink. It’s really all about the heat sink. If it looks like the photos it should be removed and cleaned thoroughly with the air can. Now might be the time to consider the option of taking your computer to a professional. No shame in wisdom. You’ve come too far to ruin the happy ending.
Warning. Math portion of the post: The number of opinions on how to clean a PC is equal to or greater than the number of computer experts asked. That’s it for the math thank goodness. I have heard and read instructions that include using not only compressed air and air compressors, but leaf blowers, paint bushes, garden hoses, dish washers, and blowing through a silly straw. I have also found instructions forbidding all of those. I’m just offering a few instructions related to my method. I can honestly say that I have never harmed a machine using my method but can’t say that harm is not possible. Do be careful.
* The clean heat sink fan photo by: Fir0002, flagstaffotos.com.au under this license http://commons.wikimedia.org/wiki/Commons:GNU_Free_Documentation_License_1.2


Wow, marvelous format! The whole look of your web site is great, as is the content!
Thank you very much for the kind words.
Thankyou!
Your resource is really unique. Keep going that way.
Thank you
Keep it up, fantastic job!
Thank you Kareem